Best material for house model

Hello all,

I envisage working with architects for house models, and I wonder which Z-Material & color is the best to use? known as:

- Would like to have the best visual apparence,

- Reducing visibility of minor flaws,

- Printing without supports (I know it's not the best way but I noticed supports leave some marks on model, and it's hard to remove)

Or any of you use to print house models and what are your tips to reach a very good looking model?

Thanks in advance for your help

Nobody use to print house or architecture models? or similar works which can partially reply to my request

Nobody use to print house or architecture models? or similar works which can partially reply to my request

I know some have.. Just don't remember who.. Look in print room to find a name..

here ya go.. Look at his links in profile. Maybe he can help. http://forum.zortrax.com/index.php?/user/14-petrusyap/

Search posts from Andreas Walther, he did a lot of Architectural prints.

Thanks for your replies! I'll contact them.

However if anyone else has some advice to my request, don't hesitate to reply here :)

I've been looking for this sort of work too.

I'd suggest HIPS if you don't need a large variety of colors...less warping/splitting and nice print quality.

Just stupidly expensive.

Hello guys,

sorry to reply so late, I am pretty busy these days...

indeed I did some "architectural" experiments a few month ago, so here is what I found out in a nutshell

- Since I do 3D visualisation, the initial Idea was to use the created  3D models and use these for 3D printing. I learned that most times, depending on the project, the models need a lot of additional love and attention to prepare them for 3d printing. Generally you have to do a lot of boolean unioning to archive a limited number of printable solids, the fewer the better if you want to avoid additional glueing work.

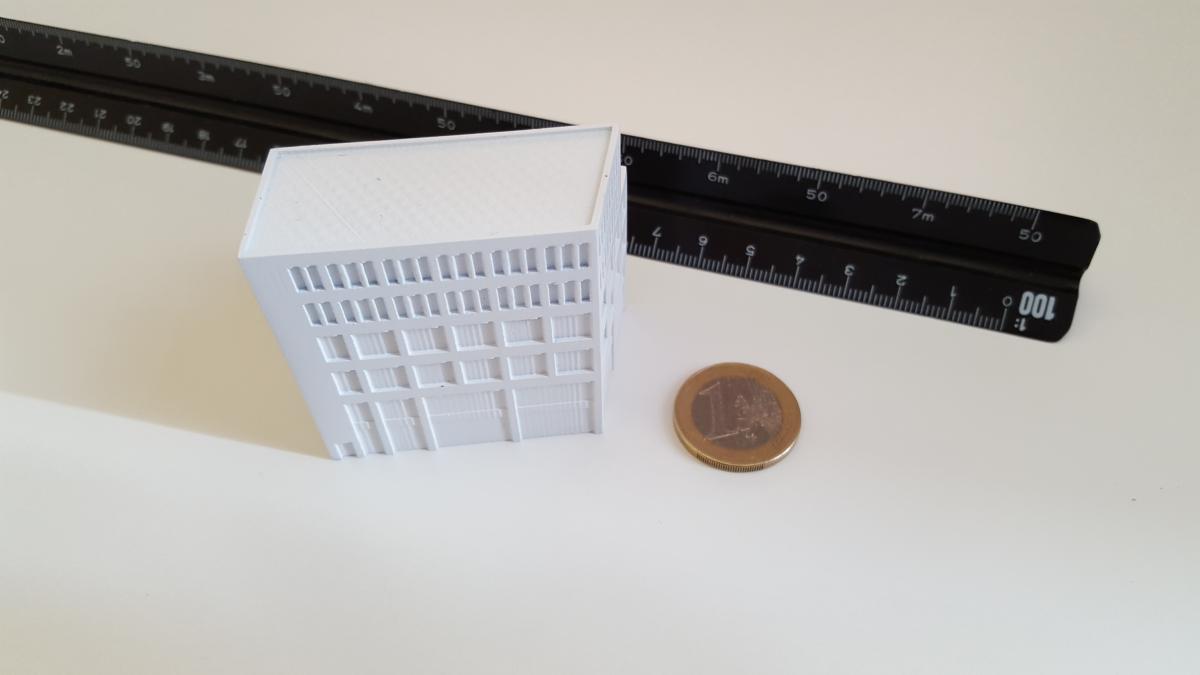
-Another point is that you have to rethink the whole model to work for 3D print. that means e.g. you have to examine delicate structures like railings, window frames and so on if they are printable at all, e.g. a 0,5 mm thick window frame will fail. Orientation of the model is also crucial since you get totally different surface qualities, vertical surfaces are usually the best, horizontal top surfaces have noticeable print pattern on them, bottom surfaces can look even worse.

Depending on the project and the targeted quality this means that you might need to post process the print by using putty and / or sanding the print. 

-Warping can be a problem too, especially on larger structures with large windows and the same time closed walls, or horizontal boards with small height, especially if you plan to print the objects in several pieces.Overall, I had the best experiences with Ultrat but have not tried hips so much, since the support removal was pretty bad during my first tries (that was shortly after they released hips, so this might be better by now due to the new drivers...) Note that also with Hips, warping was an issue!

-The prints are transluzent, that means that for most projekt it is advisable to airbrush them to achieve a better readability of the surface.

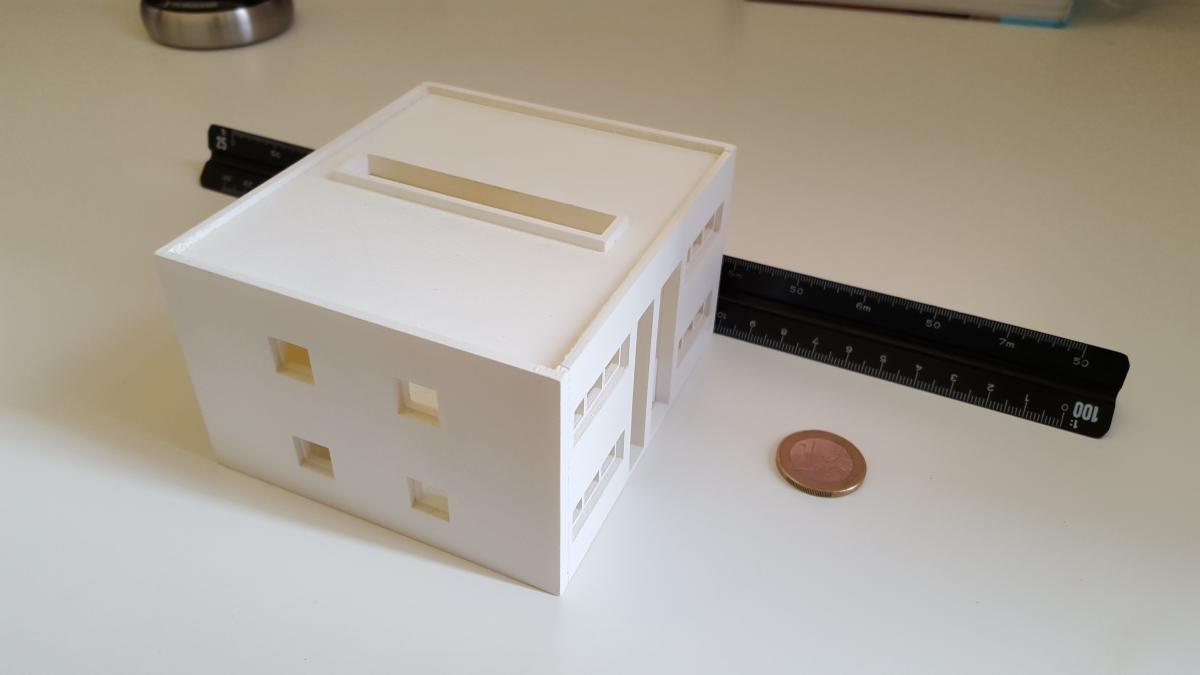
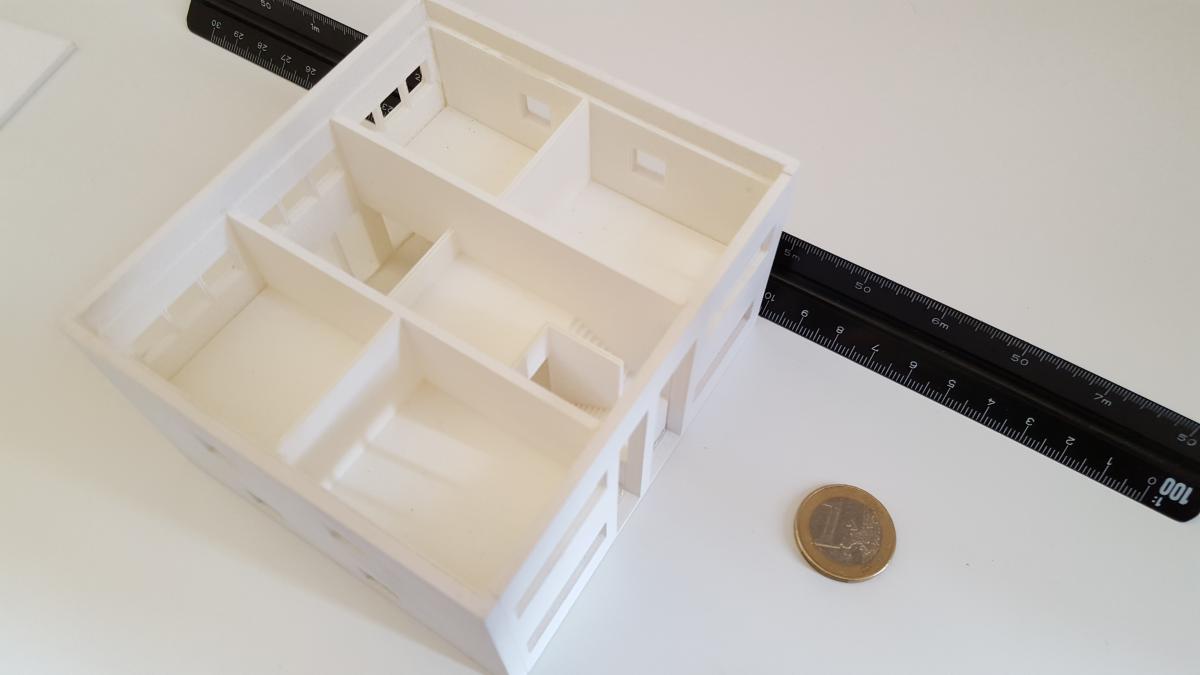
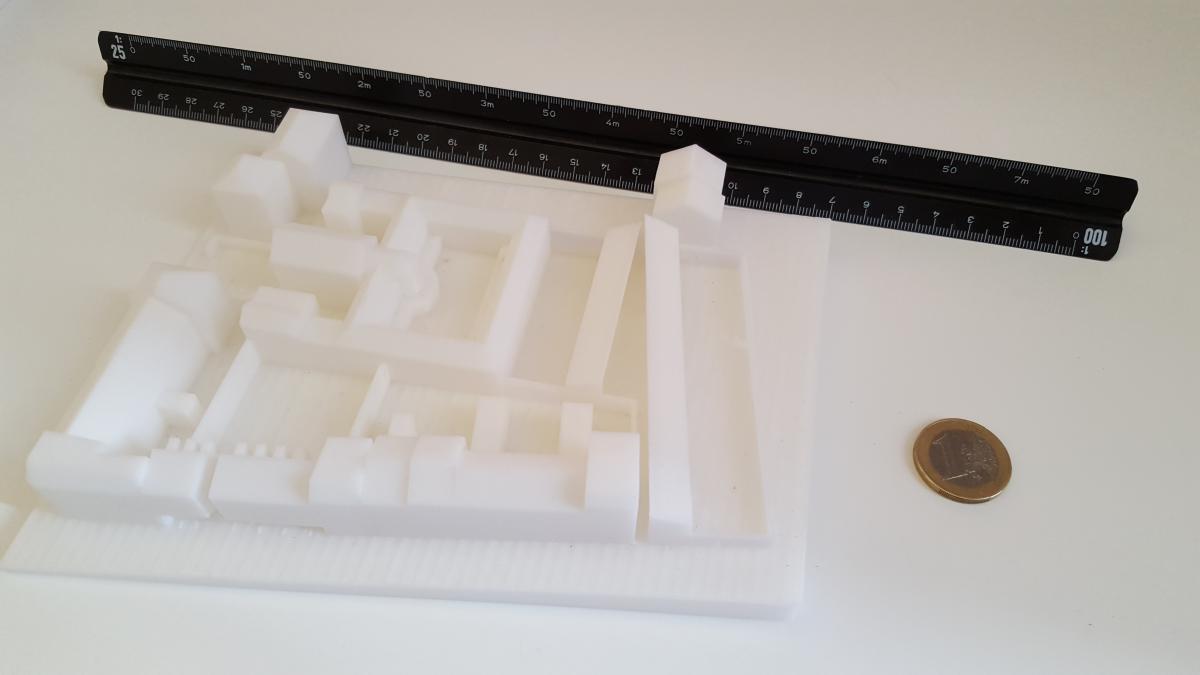
-From a business perspective (and this is very important!) you have to differentiate between simple solids resembling the scales M 1:1000 or M 1:500 and complex prints with Interiors like M 1:100. The first are very unproblematic, they are easily modeled print well and can be post processed very easy. The latter is way more complicated because really everything can go wrong. Removal of the automatic generated support can be a big pain when dealing with small structures, so you might want to use custom build supports (more work).

Complex structures with small caves or cavities can be very hard to reach for postprocessing, this might force you to split up the model more and then re glue it (more work). Warping can cause your parts to cause problems when putting them together.

That's it for now, I might add some points later.

best

Andreas

Hello again,

to illustrate the above a little bit, I attached a few pictures of differently scaled model. Note that the M1 :1000 model was not airbrushed and is as a result much harder to gasp optically ( even the camera had problems focussing...)

M 1:100 model with interior

2605

3d_print _M1-100_A.jpg

2606

3d_print _M1-100_B.jpg

M 1: 500 model, solid

2607

3d_print _M1-500.jpg

M 1: 1000 city scale model (not airbrushed)

2608

3d_print _M1-1000.jpg

best

Andreas

Hello Andreas,
 
Thanks for taking time to reply that precisely.
 
The problem is that architects will send me their models, and according what I've noticed, large majority of their models need to be reworked/repaired or rebuilt. 
So since I use 3D print I try to keep all these rules in mind when I modelise.
 
For business projects I have to focus the best compromise between model quality and time spent (e.g. if the model need to be split and glued for a better appearence to the detriment of time spent), that's why I try to avoid support as much as possible (for difficulty to remove it and marks on model).
 
For the post processing I plan to buy a mini sandblaster . Never used it yet..I need to collect more infos about how it works with 3D prints.
I read here too that some of users use hot air machine to remove support marks on models. 
Did you sand your models before airbrushing it? They look very nice
 
Concerning materials, after several tries it seems that Z-hips has the better raw appearence. (Didn't tried yet with supports and how they hard to remove compared to other materials)
 
Even your M1/1000 model looks very nice: Is it Z-ABS?
 
Cheers
Draz

Draz - can you use a laser cutter?  A model builder that I used to know used one to help make components for architectural models of housing projects, industrial plants and such.

I already used once (in a fablab) for a shop sign project. Indeed it can be a good alternative for detail and flats objects.

Depending on projects but it's a good idea.

@drazel:

All shown models are made of z-ultrat.

Concerning the sand blasting, that was something I was also very interested in…

I think I even started a tread about it.

I had high hopes that it might be the key to archive a homogeneous professional looking surface quality.

I think Julia tried it and as far as I remember, she said that it was not the magic bullet I was hoping for.

Though I never had the chance to try it out myself, I look it up from time to time. I found a system called logiblast that makes a very good impression. …

Here is an interesting link:

http://m.instructables.com/id/3D-Print-Finishing-Technique-for-Improved-Surface-/

Concerning sand blasting, I may order one soon, this kind of device:

http://www.mister-aerographe.com/Mini-Sableuse/c148/p3991/Mini-Sableuse/product_info.html

This is a mini sand blaster which works with aluminium oxide (But I saw that it can works with sodium bicarbonate)

Concerning sand blasting, I may order one soon, this kind of device:

http://www.mister-aerographe.com/Mini-Sableuse/c148/p3991/Mini-Sableuse/product_info.html

This is a mini sand blaster which works with aluminium oxide (But I saw that it can works with sodium bicarbonate)

Don't buy this!!! I have ordered exactly that thing, it is not suited for this kind of job. Does not work at all and is totally messy -> save your money...

best

Andreas

Oh thanks for fast your warn Andreas! I won't then  :D

By the way I wonder what do you mean by"it doesn't work"?

Does it means it makes the surface looking worse? or it doesn't change anything on surface?

During my tries it really did next to nothing…

Mattening the surface a tiny bit, but not usable.

I think it is more for glas…

For abs I think you need other abrasives and more pressure IMHO