How does the machine know which material is loaded?

New user here - just got my M200 2 days ago (first ever 3D printer).

How does the M200 know which Z-whatever material is loaded? I don't see any way to tell it, but surely each material needs different temperatures/speed, etc. So how does the machine know?

Is there an RFID tag on each spool or something? I'm just curious.

BTW, if anybody cares...

So far I've printed just one thing - the rook that came on the SD card.

I was amazed that it printed PERFECTLY the first try - a friend with a BCN3D Sigma spent weeks tweaking parameters until he could get a clean, reliable print.

This is EXACTLY what I wanted when I chose this machine. Just prints - not a new hobby. :-) :-)

Feedback for Zortrax (if they see this):

1 - Settle on names for things. I think I saw 5 different names for the filament guide thing on the back of the printer. Took me a while to realize they were all referring to the same thing. And "Z-ABS Juice" (online manual) vs "Z-Liquid" (sticker on the platform)??? It's pretty confusing - make yourself a glossary and stick to it!

2 - The knob on the front of the machine turns the opposite way from what I'd expect. Since it's on the right side of the display, I expect clockwise to move the cursor up, and vise-versa. It does the opposite.

3 - The auto-calibration procedure talks about "clockwise" and "counter-clockwise" but that isn't helpful, because it depends if you look at the screws from above (as when standing) or from below (as when sitting and looking at the screws). Say if you mean from the top or from the bottom.

4 - The calibration screws are too difficult to turn. If they had a larger diameter it would be much easier.

5 - The documentation that came with my unit talks about a USB cable. There isn't even a USB port, let alone a cable.

6 - The website says to make "Z-ABS Juice" with white Z-ABS. Nobody told me I needed some white filament - I have only green, blue, and black. Include a little with the printer so people can make juice.

7 - It would be very helpful to have a SINGLE PDF with all the manual information, instead of needing to download 20 or 30 files from the website, one on each topic. (I like to have things available offline.)

8 - The website talks about maintenance and lubrication, but doesn't say what kind of lubricants to use.

I hope this is helpful...
Hi Dave,

M200 knows the material from the information on the SD card you put in the M200 slot.

When you use the Zortrax slicer program, Z-Suite, you have have to specify the material you intend to use for that specific object.

Good luck with your M200.

Best Regards

Hans

Inside every M200 there is a couple of workers that determine what the filament is.

Please see this rare photograph of these workers in action:

Inside every M200 there is a couple of workers that determine what the filament is.

Please see this rare photograph of these workers in action:

What camera did you use when taking the photo? Looks very artsy, did you use a special lens?

M200 knows the material from the information on the SD card you put in the M200 slot.

When you use the Zortrax slicer program, Z-Suite, you have have to specify the material you intend to use for that specific object.

That explains it. I've only printed the rook.zcode, so haven't used Z-Suite yet.

I've got a lot to learn - I'm looking for some suitable CAD program; the only one I've ever made any progress with is OpenSCAD (but that was for a design project, not for printing). 

Maybe I can print one of my old OpenSCAD models. I'll look into it.

Take a look at Designspark Mechanical if you are looking at making non organic items. It's 100% free!! It is a scaled down version of Spaceclaim. Extremely powerful software..

Also checkout AutoDesk Fusion... free for hobby use and small companies under 100k revenue

New user here - just got my M200 2 days ago (first ever 3D printer).

How does the M200 know which Z-whatever material is loaded? I don't see any way to tell it, but surely each material needs different temperatures/speed, etc. So how does the machine know?

Is there an RFID tag on each spool or something? I'm just curious.

BTW, if anybody cares...

So far I've printed just one thing - the rook that came on the SD card.

I was amazed that it printed PERFECTLY the first try - a friend with a BCN3D Sigma spent weeks tweaking parameters until he could get a clean, reliable print.

This is EXACTLY what I wanted when I chose this machine. Just prints - not a new hobby. :-) :-)

Feedback for Zortrax (if they see this):

1 - Settle on names for things. I think I saw 5 different names for the filament guide thing on the back of the printer. Took me a while to realize they were all referring to the same thing. And "Z-ABS Juice" (online manual) vs "Z-Liquid" (sticker on the platform)??? It's pretty confusing - make yourself a glossary and stick to it!

2 - The knob on the front of the machine turns the opposite way from what I'd expect. Since it's on the right side of the display, I expect clockwise to move the cursor up, and vise-versa. It does the opposite.

3 - The auto-calibration procedure talks about "clockwise" and "counter-clockwise" but that isn't helpful, because it depends if you look at the screws from above (as when standing) or from below (as when sitting and looking at the screws). Say if you mean from the top or from the bottom.

4 - The calibration screws are too difficult to turn. If they had a larger diameter it would be much easier.

5 - The documentation that came with my unit talks about a USB cable. There isn't even a USB port, let alone a cable.

6 - The website says to make "Z-ABS Juice" with white Z-ABS. Nobody told me I needed some white filament - I have only green, blue, and black. Include a little with the printer so people can make juice.

7 - It would be very helpful to have a SINGLE PDF with all the manual information, instead of needing to download 20 or 30 files from the website, one on each topic. (I like to have things available offline.)

8 - The website talks about maintenance and lubrication, but doesn't say what kind of lubricants to use.

I hope this is helpful...

Z-ABS juice.. Use whatever color you want.. I print mostly black.. I use the old rafts. You can clean the bed with Acetone if it starts looking bad. For lubrication I use Super Lube. Ace Hardware carries it out here. (or amazon) 1 tube should last a lifetime.

Welcome!!! You have a great printer!!

I do my own designs with OpenScad only.

FreeCAD is pretty good for a free tool. It has some rough edges admittedly and I needed to get used to some of its concepts (like defining "Sketches" by restrictions) but I didn't need much time to construct my 1st parts. Plus there are lots of macros available for gears, screws and the like.

I also used PTC Creo Elements (free version) now and then but it's a completely different workflow (non-parametric but works better if you want to import and extrude DXF files). 

Main downside is that it needs an online connection to start and once I needed it, the free registration server was down for several weeks so you couldn't even start it. Meh.

Also tried Onshape, but the alway online approach was too limiting and apart from technical issues (menus sometimes not appearing), I actually found FreeCAD easier to use.

CAD: Get a parametric modeller like SolidWorks (expensive), but you can find cheaper, or free, alternatives like Autodesk Fusion 360. Never tried it, but looks nice. 

If it is the first time you are creating 3d models, you can have a look at https://www.tinkercad.com/ .

It is not the most powerfull 3d editor but it is easy to learn with great tutorials.

Later if you already got the feeling of 3d design you stil can loook for more complex/powerfull editors.

Tinkercad rocks.

FWIW, I've now used Z-Suite exactly once, to print an old OpenSCAD file that I never imagined printing.

It worked great - first try:

IMG_20170130_213339.jpg

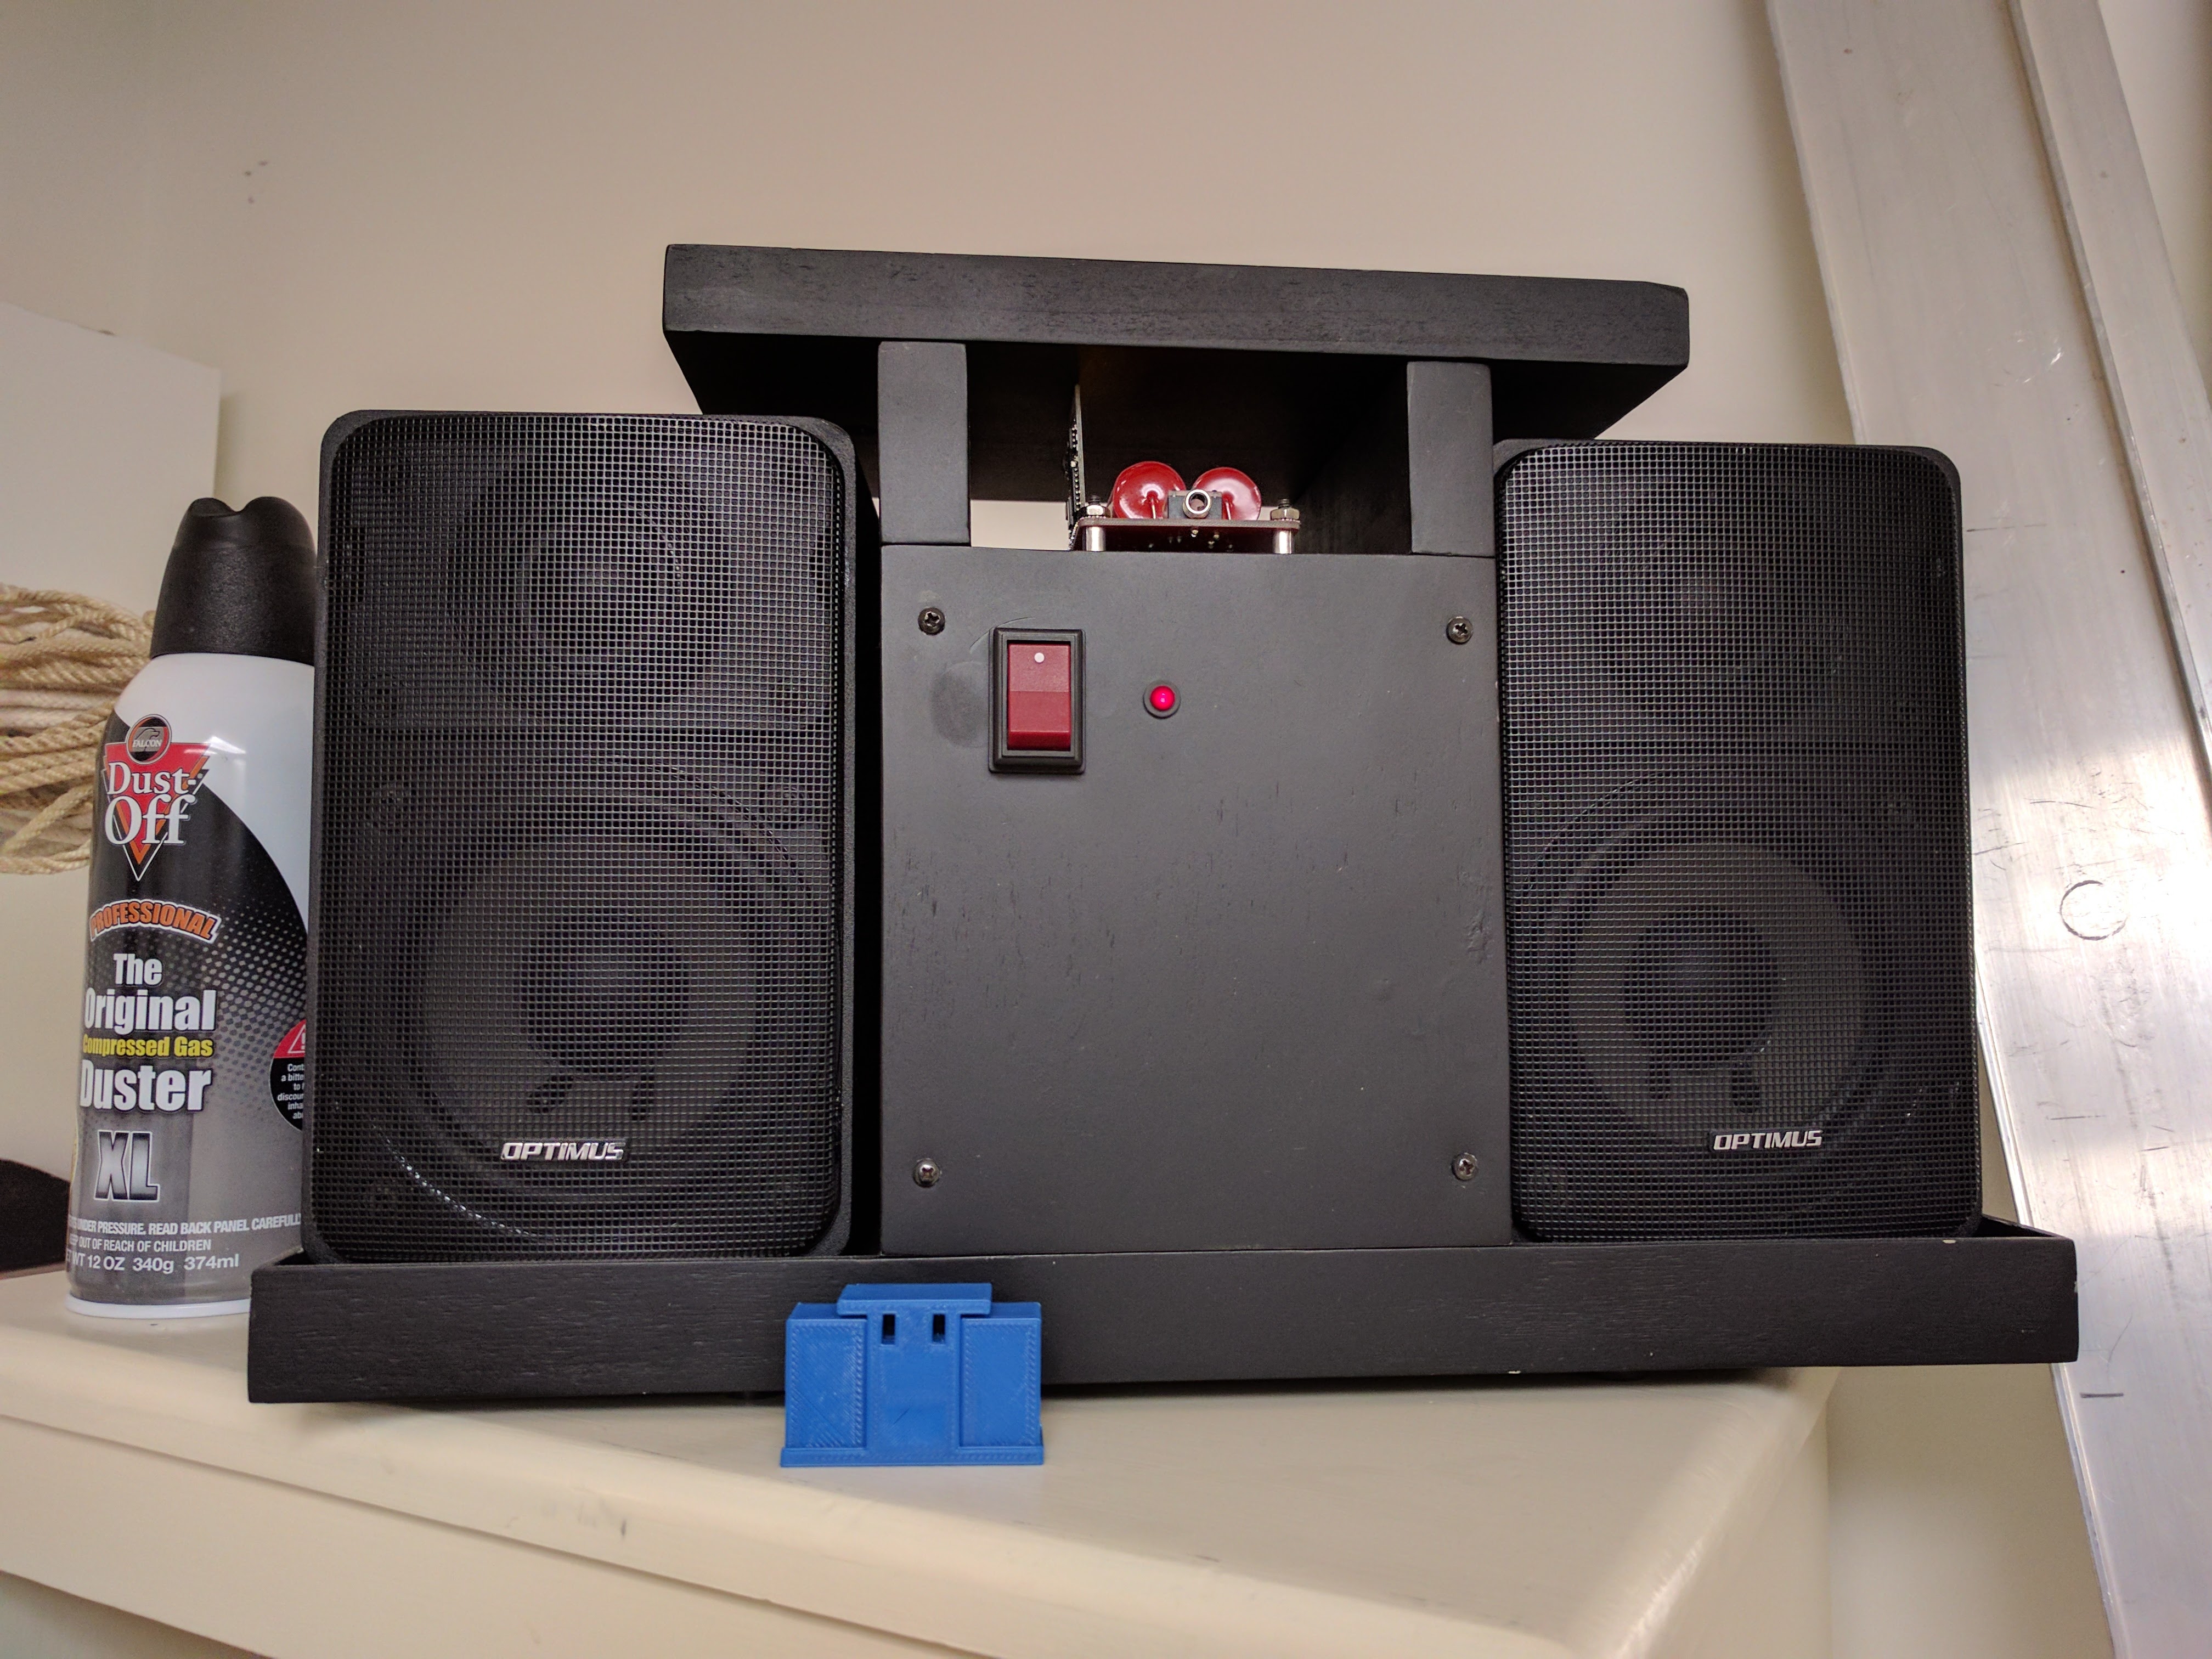
It's a home-made Bluetooth speaker I designed in OpenSCAD in 2013, together with the model I printed today.


(Files and details on my blog: http://nerdfever.com/openscad-is-great-stuff-part-2/ )

1 - Settle on names for things. I think I saw 5 different names for the filament guide thing on the back of the printer. Took me a while to realize they were all referring to the same thing. And "Z-ABS Juice" (online manual) vs "Z-Liquid" (sticker on the platform)??? It's pretty confusing - make yourself a glossary and stick to it!

2 - The knob on the front of the machine turns the opposite way from what I'd expect. Since it's on the right side of the display, I expect clockwise to move the cursor up, and vise-versa. It does the opposite.

3 - The auto-calibration procedure talks about "clockwise" and "counter-clockwise" but that isn't helpful, because it depends if you look at the screws from above (as when standing) or from below (as when sitting and looking at the screws). Say if you mean from the top or from the bottom.

4 - The calibration screws are too difficult to turn. If they had a larger diameter it would be much easier.

5 - The documentation that came with my unit talks about a USB cable. There isn't even a USB port, let alone a cable.

6 - The website says to make "Z-ABS Juice" with white Z-ABS. Nobody told me I needed some white filament - I have only green, blue, and black. Include a little with the printer so people can make juice.

7 - It would be very helpful to have a SINGLE PDF with all the manual information, instead of needing to download 20 or 30 files from the website, one on each topic. (I like to have things available offline.)

8 - The website talks about maintenance and lubrication, but doesn't say what kind of lubricants to use.

I hope this is helpful...

1. We are trying to use Filament Guide name everywhere, but we cannot force users all around the world to stop naming it "Teflon Tube at the back" for example :) As for the Z-Liquid, can you get me a photo of that sticker?

2. Its hard to say anything about that, it works exactly I would expect. I'm aware that repraps/arduino LCDs works in opposite way but to be honest it felt unnatural when I was using it. 

3. You are making your life difficult, clockwise is clockwise, no matter what angle you are using. Take your wall clock and look at it from the bottom, hands still moving clockwise. ps. there is an arrow which shows direction. 

4. Noted

5. --

6. Its not necessary, any other colors than white will leave a mark on your plate but that won't affect your prints. 

7. That would be hell of the book, wouldn't it? A lot of manuals have videos, that one-file support file would hurt our bandwidth badly.

8. You should get grease with your printer, that should be enough for a while.

To answer no 5, please send me your SN through PM.  

3. You are making your life difficult, clockwise is clockwise, no matter what angle you are using. Take your wall clock and look at it from the bottom, hands still moving clockwise. ps. there is an arrow which shows direction. 

Normally, at least here in the US, rotational direction of a screw is specified from the point of view of the fastener head.  When you say "turn clockwise" for a bed screw that would be interpreted as clockwise looking from the bottom of the perf bed in an upward direction, since the head is underneath the bed.

1. We are trying to use Filament Guide name everywhere, but we cannot force users all around the world to stop naming it "Teflon Tube at the back" for example :) As for the Z-Liquid, can you get me a photo of that sticker?

2. Its hard to say anything about that, it works exactly I would expect. I'm aware that repraps/arduino LCDs works in opposite way but to be honest it felt unnatural when I was using it. 

3. You are making your life difficult, clockwise is clockwise, no matter what angle you are using. Take your wall clock and look at it from the bottom, hands still moving clockwise. ps. there is an arrow which shows direction. 

4. Noted

5. --

6. Its not necessary, any other colors than white will leave a mark on your plate but that won't affect your prints. 

7. That would be hell of the book, wouldn't it? A lot of manuals have videos, that one-file support file would hurt our bandwidth badly.

8. You should get grease with your printer, that should be enough for a while.

To answer no 5, please send me your SN through PM.  

Re 1 - Re names, see the photo "FilamentSpoolHolderThings.jpg" (attached).

In Step 6 we have "filament guide"

In Step 7 we have "spool holder"

In Step 8 we have "filament holder" and "filament guide" (they sound very similar, don't they?)

Now look at http://support.zortrax.com/preparation-for-the-first-use-m200/ (currently on Zortrax's website).

In there it's called "material guide" (in 2 places).

So we have 4 names for 2 different things. It's quite confusing.

I'm attaching another photo showing the "Z-Liquid" sticker (vs. "Z-ABS Juice"). It's on the plastic packaging for the heated bed/perforated plate.

Also, I noticed that the plastic stuff that gets melted is usually called "filament", but sometimes called "material" (as in the link above, in the firmware, and at https://store.zortrax.com/materials). I don't care what you call it, but it would be simpler if you picked one name for it.

It would be ideal to have a glossary of technical terms, and use those terms consistently.

Re 2 - This is a matter of opinion. But I've used many rotary-knob user interfaces (not on printers - on other machines), and always the cursor moves the same direction as the part of the knob closest to the display. Only the Zortrax is different. (Of course after a while you get used to it and don't notice.)

Re 3 - I apologize for not making myself clear. Let me try again.

Look at the attached photo "Clockwise.jpg". Imagine you have a watch flat on your desk, as in the top part of the photo.

We both agree what 'clockwise' means in this case.

Now imagine that you flip the watch upside down, so the hands face the desk, as in the bottom part of the photo.

Which way is clockwise now? Since you flipped the watch upside down, now the hands are going the other way around - from your viewpoint.

So it matters which way the "clock" is oriented - up or down. Until you know which way the imaginary "clock" is oriented, you don't know which way is "clockwise".

The Zortrax documentation assumes the clock is facing up. That's OK, but you need to say this.

Especially since when you are looking at the calibration screws, you're looking UP from BELOW. So it might be natural to assume the clock is facing you - facing down toward your face.

The arrow diagram the firmware draws has the same problem - you don't know how to interpret the arrows until you know which way it assumes you're looking - down from above or up from below.

I suggest you say "clockwise from above" or even better, if you have room, "clockwise as seen from above".

5 - I'll PM you my S/N.

7 - Actually I found a single PDF manual (thru Google) that has all the info in one place. I'm attaching it. But I can't find it on Zortrax's website, and I suspect it's out-of-date (it uses the old logo). It would be really helpful to have an updated version on the website for download.

Best regards,

--Dave

Re 1 - Re names, see the photo "FilamentSpoolHolderThings.jpg" (attached).


In Step 6 we have “filament guide”

In Step 7 we have “spool holder”

In Step 8 we have “filament holder” and “filament guide” (they sound very similar, don’t they?)


Now look at http://support.zortrax.com/preparation-for-the-first-use-m200/ (currently on Zortrax’s website).


In there it’s called “material guide” (in 2 places).


So we have 4 names for 2 different things. It’s quite confusing.


I’m attaching another photo showing the “Z-Liquid” sticker (vs. “Z-ABS Juice”). It’s on the plastic packaging for the heated bed/perforated plate.


Also, I noticed that the plastic stuff that gets melted is usually called “filament”, but sometimes called “material” (as in the link above, in the firmware, and at https://store.zortrax.com/materials). I don’t care what you call it, but it would be simpler if you picked one name for it.


It would be ideal to have a glossary of technical terms, and use those terms consistently.


Re 2 - This is a matter of opinion. But I’ve used many rotary-knob user interfaces (not on printers - on other machines), and always the cursor moves the same direction as the part of the knob closest to the display. Only the Zortrax is different. (Of course after a while you get used to it and don’t notice.)


Re 3 - I apologize for not making myself clear. Let me try again.


Look at the attached photo “Clockwise.jpg”. Imagine you have a watch flat on your desk, as in the top part of the photo.


We both agree what ‘clockwise’ means in this case.


Now imagine that you flip the watch upside down, so the hands face the desk, as in the bottom part of the photo.


Which way is clockwise now? Since you flipped the watch upside down, now the hands are going the other way around - from your viewpoint.


So it matters which way the “clock” is oriented - up or down. Until you know which way the imaginary “clock” is oriented, you don’t know which way is “clockwise”.


The Zortrax documentation assumes the clock is facing up. That’s OK, but you need to say this.


Especially since when you are looking at the calibration screws, you’re looking UP from BELOW. So it might be natural to assume the clock is facing you - facing down toward your face.


The arrow diagram the firmware draws has the same problem - you don’t know how to interpret the arrows until you know which way it assumes you’re looking - down from above or up from below.


I suggest you say “clockwise from above” or even better, if you have room, “clockwise as seen from above”.


5 - I’ll PM you my S/N.


7 - Actually I found a single PDF manual (thru Google) that has all the info in one place. I’m attaching it. But I can’t find it on Zortrax’s website, and I suspect it’s out-of-date (it uses the old logo). It would be really helpful to have an updated version on the website for download.


Best regards,


–Dave

First of all, bear in mind that printed Quick Start that came with your M200 is outdated, same applies to PDF that you’ve attached. We are now using “material”, instead of “filament”.

Filament Guide = Material Guide =/= Spool Holder = Filament holder

Those are 2 different things:

  • Material Guide (filament guide) is a transparent Teflon tube

  • Spool holder, its proper name for printed part that holds spool ( :slight_smile: ) It has been called filament holder by mistake (Step 8 of FilamentSpoolHolderThings.jpg)

Z-Liquid is nothing more than ABS Juice, we decided not to use Z-Liquid anymore.

To be honest - its very hard for me imagine looking at the screw cap directly from the bottom - and thats the only POV that swap clockwise with counter-clockwise (and opposite).

However, you are right - we’ll fix all online content and add “from above” note.

  1. Printed has been bought at the beginning of May 2016, we are not providing USB cables and manufacturing M200 with USB ports anymore - it has to be one of the last with outdated Quick Start and manual that says anything about USB connection.

  2. Yeah, its outdated. Since that time, our Support site evolved greatly, we’ve added so much content (including a lot video manuals) so the whole site exceeds 2GB size. Every single manual could be downloaded as PDF (button at the top of document). Optionally you can use 3rd party software which allows downloading whole site (support.zortrax.com) in that case but bear in mind that i’m around 20-30% way done, it took me 10 minutes and its about 1GB already.

To be honest - its very hard for me imagine looking at the screw cap directly from the bottom - and thats the only POV that swap clockwise with counter-clockwise (and opposite).

Yes, but when you first get the printer and calibrate it the very first time, you need to look under the bed to see where the screws are.

That one time you're looking up from below - and that's when the "clockwise" confusion can happen.

After that, you know where they are and don't need to look again.

This is one of those things that seems "completely obvious" to experienced people (including those writing documentation and doing support), but which are not obvious to newbies.

:-)

Thanks again!

--Dave

To be honest - its very hard for me imagine looking at the screw cap directly from the bottom - and thats the only POV that swap clockwise with counter-clockwise (and opposite).

For me, and I suspect anyone who has grown up mechanically-oriented, it's instinctive to visualize a screw's rotation from the view facing the head of the screw. Doesn't matter if the screw is upside-down or facing the other way, I still see 'clockwise" from the viewpoint of the screw head, which in the case of the bed adjusters, is from the bottom.