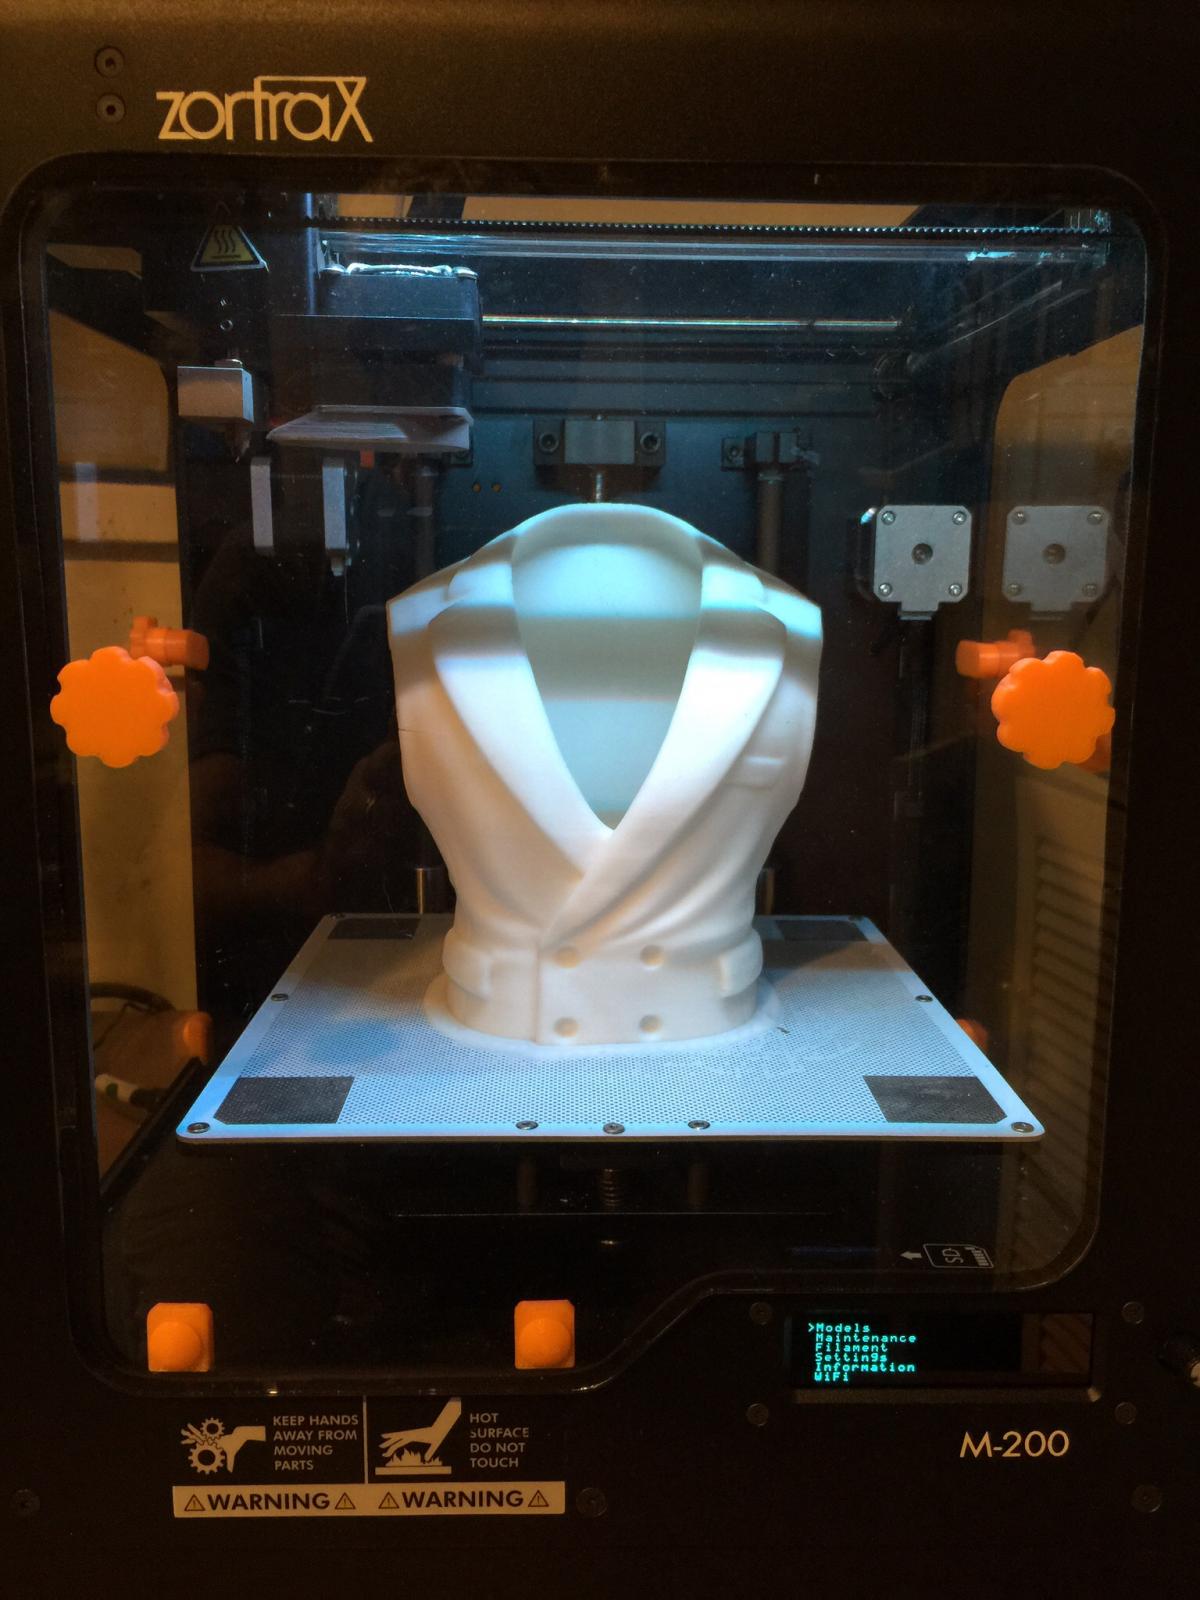
This is probably the largest print I have done on my m200 taking 37 hours. It is part of the Mr Walthersnap figurine from Bold Machines (http://www.thingiverse.com/thing:457242) and I am very pleased with the way it came out.
I had to use the slice feature to slice off the bottom 1/2" of the piece as at two times the scale it was higher than the m200 print envelope. I printed the two pieces separately and glued them together .
I have already printed the Margo figure and I am currently preparing it for painting.
Thanks. Jose Alves da silva models are great and very well designed for printing with either no support required or with built in supports. A great example of model designs for 3d printing.
Coupled with the superb quality printing from the m200 produces some of the best prints I have seen.
I have been printing all the parts at 0.14 layers except heads which I print at 0.09. Takes a lot longer but aids in ultimately getting a finish that pretty much hides the fact that its 3D printed and therefore requires less finishing work.
First I give the model a quick sanding in any areas which obviously show the filament strata .
Next I spray with clear Deft sanding sealer and once dry sand again.
Then I spray with Rustoleum 2in1 filler and sandable gray primer and sand again. Any visible bad areas (very few on the m200) I then fill with Tamiya putty, dry and then sand.
Then usually another cost of 2in1 filler if needed.
Final fine sanding then a coat of Tamiya fine primer.
Then I (mostly) airbrush acrylic paint (I use Golden fluid and high flow acrylics) which I thin as needed.
Then a final coat of Testors dull coat to protect.
Her head is attached to the body with magnets so I can remove it. I may paint another print of her head as I am not totally happy with the current painting.
There not Z-PLA yet, Yes I think about UV influence more than temperature, ABS can become "brittle"
Very true unstabilized ABS is notoriously bad with UV exposure, If the ABS has been compounded with UV stabilizers it doesn't become as brittle but most filament doesn't contain UV stabilizers.
I've never noticed any issues though with my prints that are outdoor.