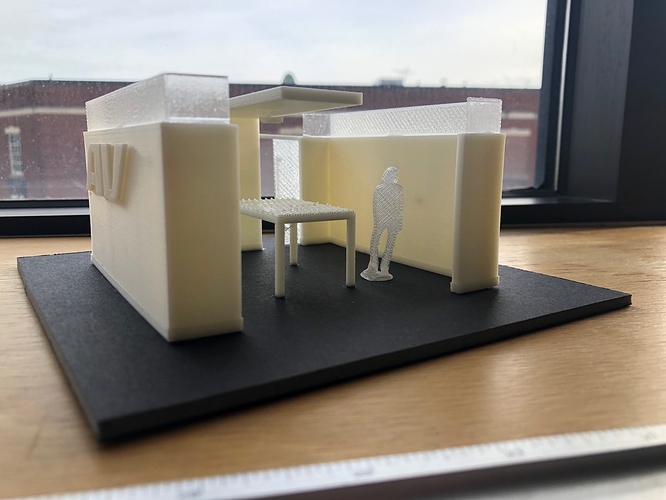
I thought I’d start a thread for printing architectural models. I’ll post a few shots of recent architectural models with some tips and tricks I’ve learned along the way.
Here is a facade I’m working on, built in 6 parts. I printed the windows on their own and then friction fit them in. Each of the 6 pieces took approx 12 hours on the finest settings. I’ve also used dovetail keys to tie the 6 pieces together, no glue needed. It’s been pretty effective. the keys are hollow and give a bit of flex if the fit isn’t exactly correct.
I used green filament and then painted, not a great choice, I now print in PLA Pro - Gypsum White.
I wish I had:
Integrated a sturdier base
Used gypsum from the start
Hello,
very interesting thread.
Could you explain how you printed the windows and doors ?
Do you print these pieces flat on the aluminum plate ?
The window frames are very thin : how did you manage not to break them?
Sure, for the windows I did a few test prints to find the correct thickness for the mullions so they would both print and not fall apart upon removal from the raft / plate. I have had the most luck (with all my prints) using the full raft. The orientation was flat on the plate. For these windows, when I pried the raft off the windows popped like popcorn right off the raft, I didn’t really do anything post. They are not perfect, but for my purposes they do the job. I used the fine setting, .09 layer and a full raft on the default raft settings. This is Zortrax ABS filament. Here’s an image for scale.
The Z-Suite software has not detected things like window mullions that are too small, or floor slabs too thin. I’ve done test prints to find the correct model thickness to get the desired results.
Same process for the doors. Almost all the door hardware broke off by either my own clumsy-ness or removal from the raft. I just made them too delicate, I just glued back on. And my preferred glue is gorilla glue GEL. The gel is fantastic, it stays in place and doesn’t run all over everything and dries nice and clear.
Here is a simple site model with an existing building we are redesigning. The building is banal but I wanted a site that I can plop new designs into. The site is made of 2 pieces that are the max size of the plate.
I made one solid building that sits in the model and one more delicate that can be opened up to see the existing conditions on the inside.
I also dovetail keyed the two halves of the building together.
This whole model would be much better at 2x the size, this is the absolute minimum to get any detail whatsoever. I even cheated and made the walls / floors / roofs thicker than reality to make it more sturdy.
We are starting design soon and we will make some more interesting buildings to be dropped in.
Hello,
Thank you for these explanations.
Nice tip to be able to easily change the exterior facades.
Do you print at a scale of 1/100 ?
On an M200, an M300 ?
No warping problem with PLA PRO ?
I’ve been maximizing the scale. I use these for discussions with clients, so scale is not important to me, I just want the models as big as reasonably possible. The site building in the post above is about 1:20, and the facade above that is about 1/4”.
I use an M200 plus.
I have not had any warping problems as long as I use the default raft. This is for pla, abs and glass, I’ve printed all with rafts and not had any warping.
Here are a few images of some schematic interiors we are working on, this is the draft model. We are working on a 3 level version with removable floors now.
Here is an entry we are working on. I used pla pro in gypsum and concrete. Really love the concrete. it has a cool speckled texture.
And here’s a tip for gluing up small objects, i use binder clips instead of my unsteady hands.
Here are a few interior mock ups. This is z-abs and zglass. The zglass is interesting stuff, although not quite as transparent as I thought it would be.
When i need small details i use 0.3 nozzle a hips material.


