Been printing in PETG recently and this material is a sticky mess! But I’m making COVID visors and this is the recommended material. Please help me get my machine working again so I can continue to help.
My nozzle is crashing into the print bed at the start of every print. It calibrates OK without this crashing behaviour. The printbed has been damaged by the impact.
I went through the checks on this page Troubleshooting: Perforated Plate Hits the Nozzle | Zortrax Support Center and got an unexpected result at step 9 “check the resistance between the nozzle and the thermocouple’s signal cable”. I tried two different nozzles, neither returned the expected resistance. The problem started when I put in a brand new nozzle so I don’t think the solution is to replace the nozzle.
I have two questions.
-
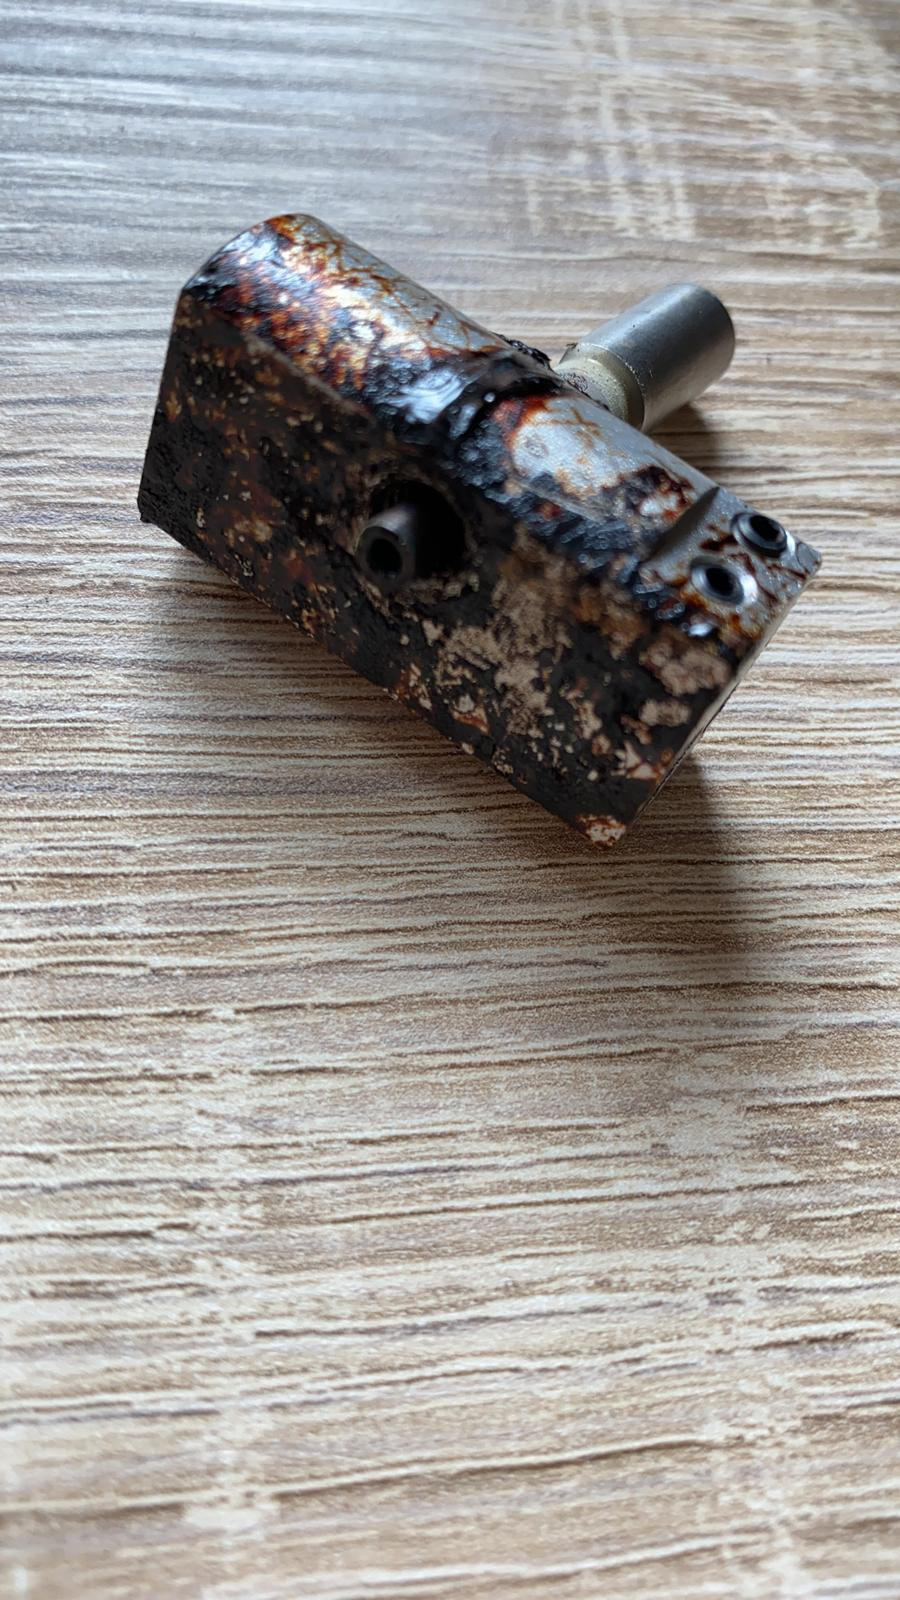
This is what the hotend looks like - do you think the burned-on plastic might be causing the problem?
-
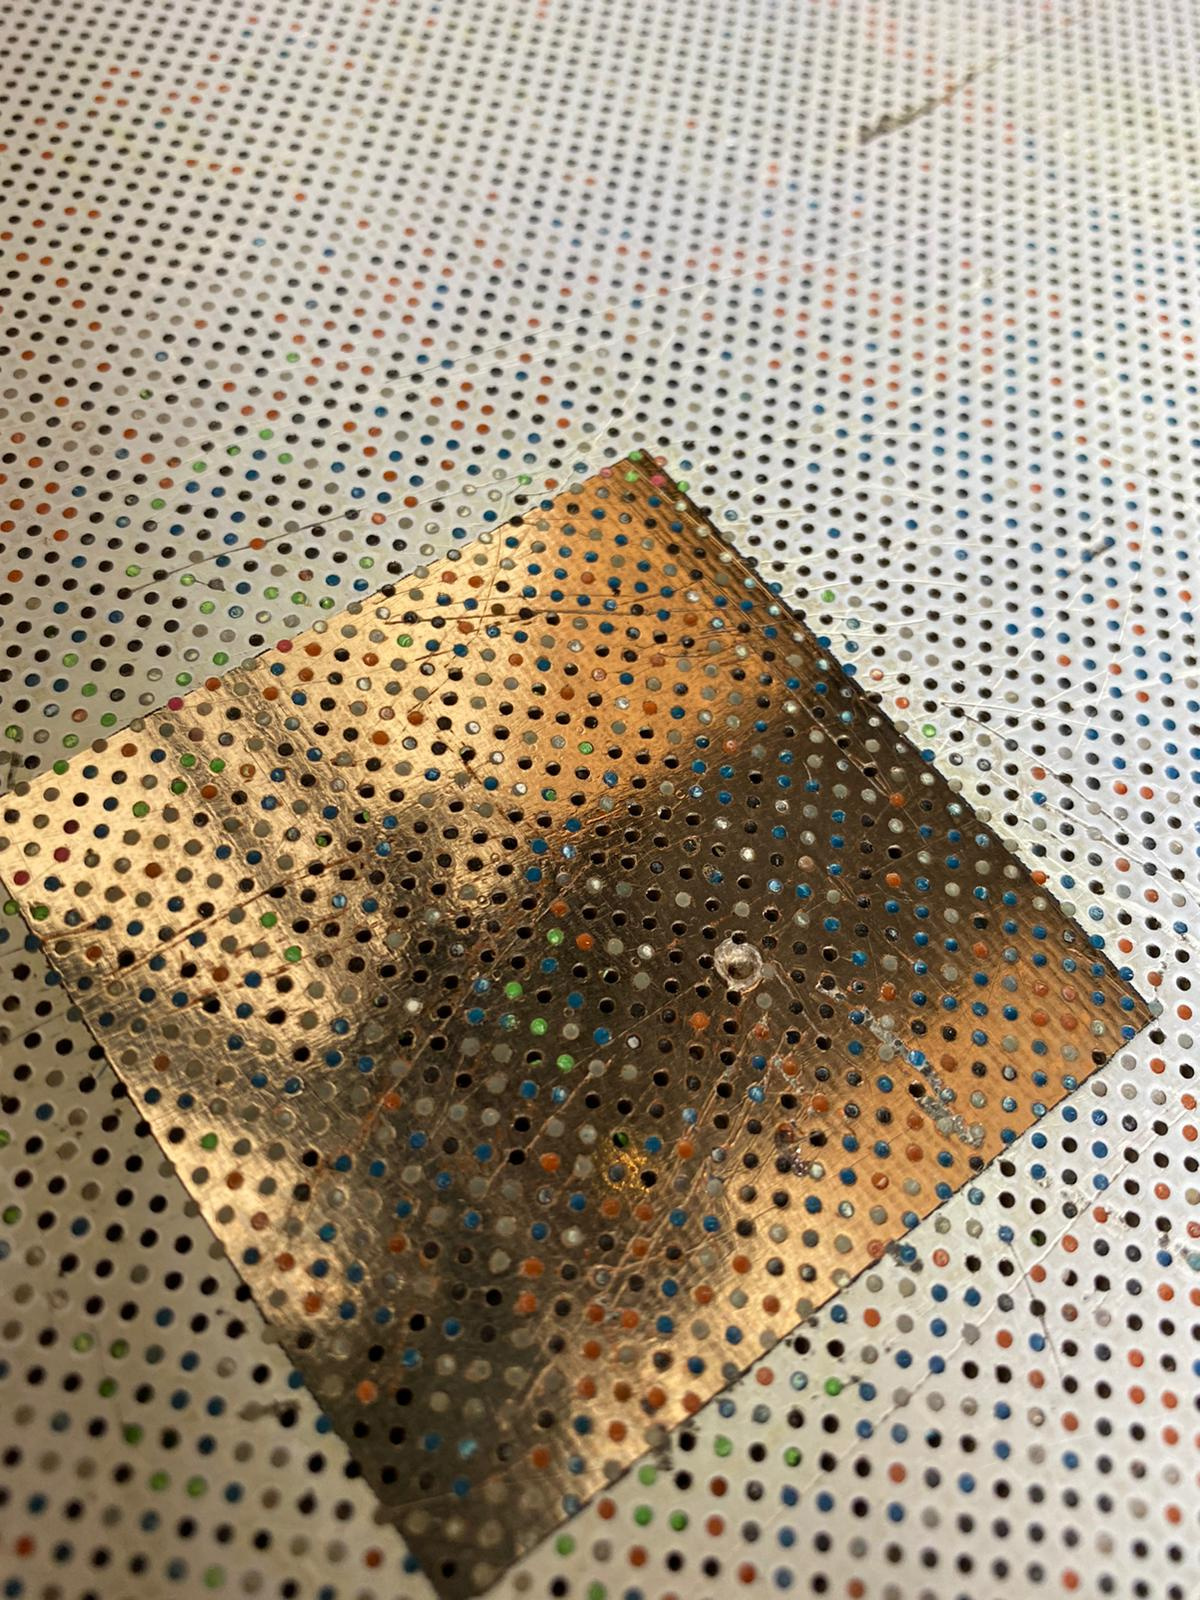
The printbed is now damaged - the nozzle has gouged out some material here:
Can this still work despite the damage?
For the damaged bed, i remember other people fixing it by bridging solder smooth across the damaged part.
Also, I cant remember if the probing area is the same or different between prints. If it’s the same, then you should also be able to get around the damaged spot by changing the trigger points (by a small amount) of the homing switchs in the top front corners, few layers of thick tape or something to offset it a small amount (not much!).
Check the resistance between the nozzle and the hot end itself, it it’s high then the nozzle is not making good contact with the hot end like you suspect.
Hi and thanks for the reply! Much appreciated.
I’d like to learn more about “changing the trigger points of the homing switchs in the top front corners”. Sound promising! Does this mean sticking some tape to cover a narrow strip along the two front metallic squares?
Jean
I think I’m thinking of a different part. The xy homing is determined between limit switches attached to the machine frame, and locating legs on the end of the xy blocks.
Don’t remove anything as shown in videos, but to show you where they are:
Endstops Replacement in 3D Printers | Zortrax Support Center
Endstop Sleeves Installation in 3D Printers | Zortrax Support Center
You could try tape on the sleeves.
I did this by bending the limit switch levers by just the tiniest amount. That shifted my home location just enough to move the probing locations off of the damaged areas.
Good to hear; was going to suggest that way, but didn’t want to be responsible for it if one broke  Glad it’s working