I am having a bit of a "Lamp printing problem" at the moment. After the Voronoi Lamp and Zuzanna Lamp i have now reached the PARIS lamp. I started printing the first bits, but the result is a bit sub-optimal.
I printed with Z-ABS, Plain White, 0.19mm Resolution, No Support (you have to), Auto Fan.
The result is of course a lot of sagging/hanging Filament due to the overhang and lots of burn marks.
Next step was to add the Dual Fan Shroud Mod with Noctua Fans and print with 80% Fan Setting.
A little less burn marks, but the result is still not so great.
I currently think there is not much i can do and my best option would be to clean the bits as good as possible after printing and add a solid layer of spray paint at the end to camouflage the deficits.
What do the experts say? Any more settings i can try to tweak things in Z-Suite a little?
Bests,
Tobias
P.S.: Hmm... I guess this was the wrong Sub-Forum. Can somebody move it? Thanks! - Mental note to myself: Do not post late at night.
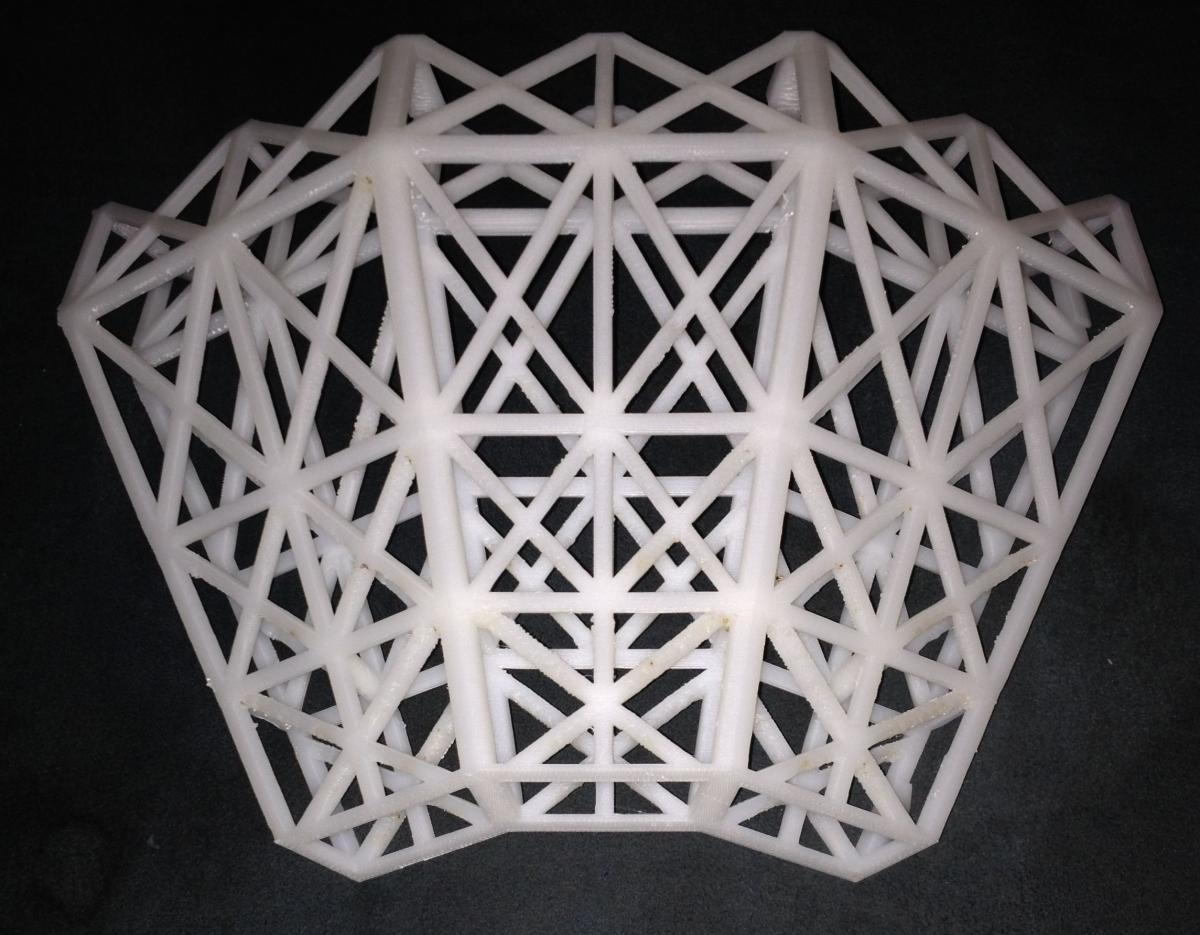
Here are a few pictures of PARIS lamp in progress on Zortrax M200.
I started printing with white Z-ABS, which is not optimal. Warping and Cracking issues.
Maybe Z-PETG or Z-HIPS would have been better.
The parts are supposed to be printed without support but i have no clue how that should work.
If you print with support, you end up with support within the model and have to dig that out bit by bit with cutter-knive and pliers, so i didn't try that.
The top part of the lamp looks ok, as the overhang with the sagging filament is on the inside and spraying it with grey paint camouflages the defects a bit. The bottom part will look pretty shitty as the overhang defects can be seen from the outside and due to the stupid clips i can't turn the model upside down.
The only reasonable approach i could see would to add some support manually with some tool. Mind you Meshmixer usage is really beyond me... Worse than Blender3D.
Alas here are the pictures for your entertainment:
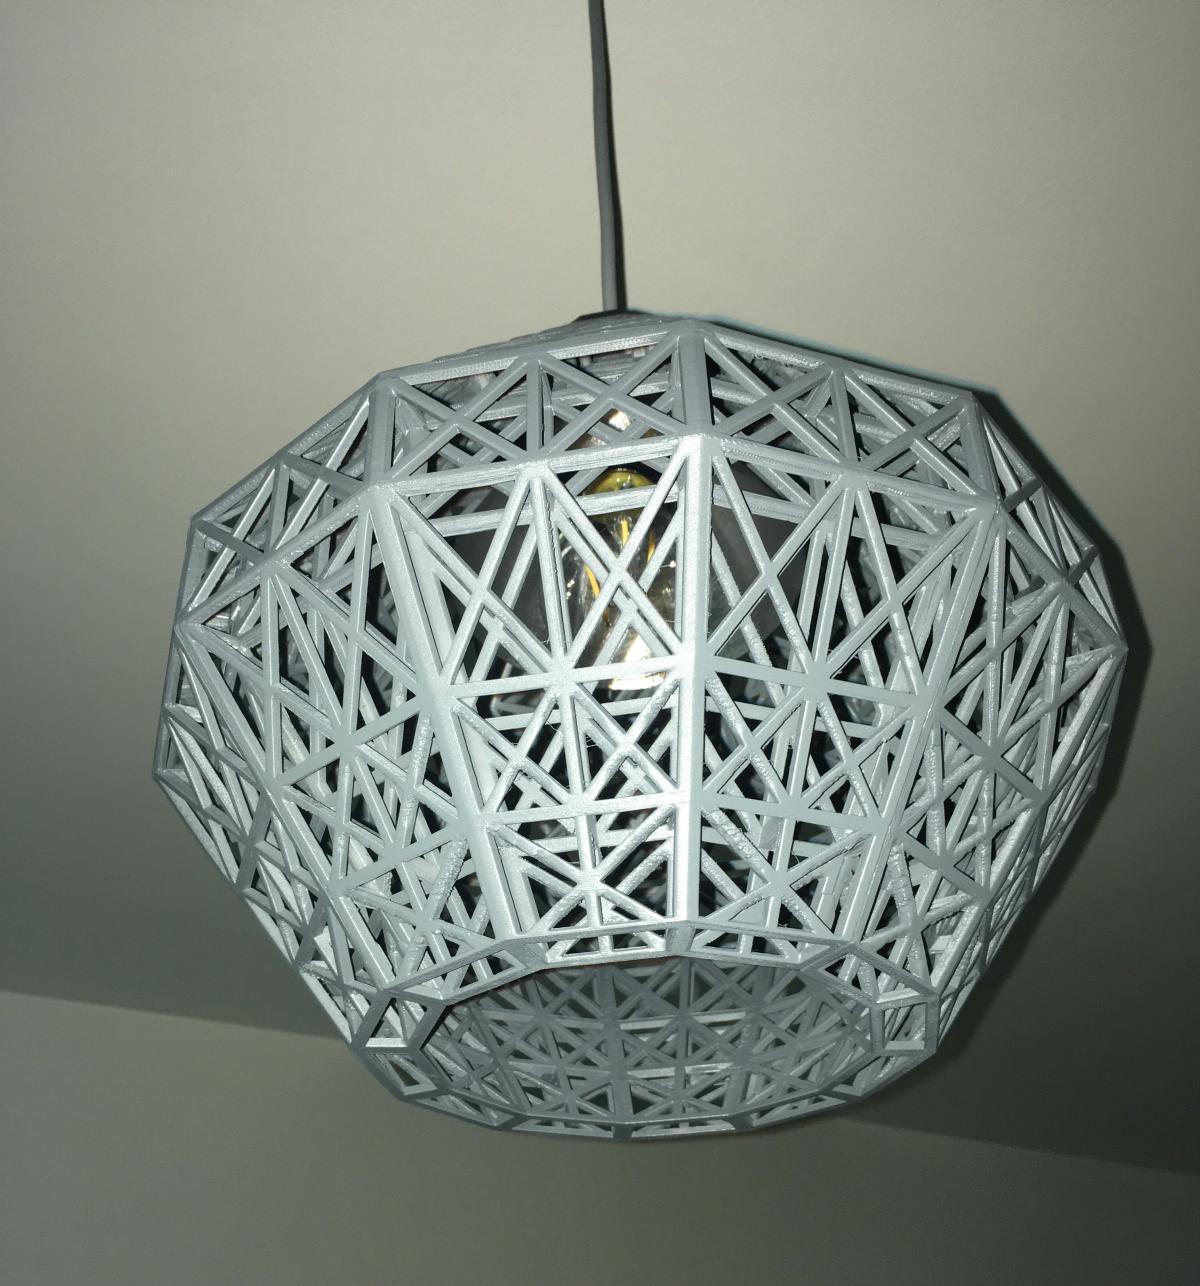
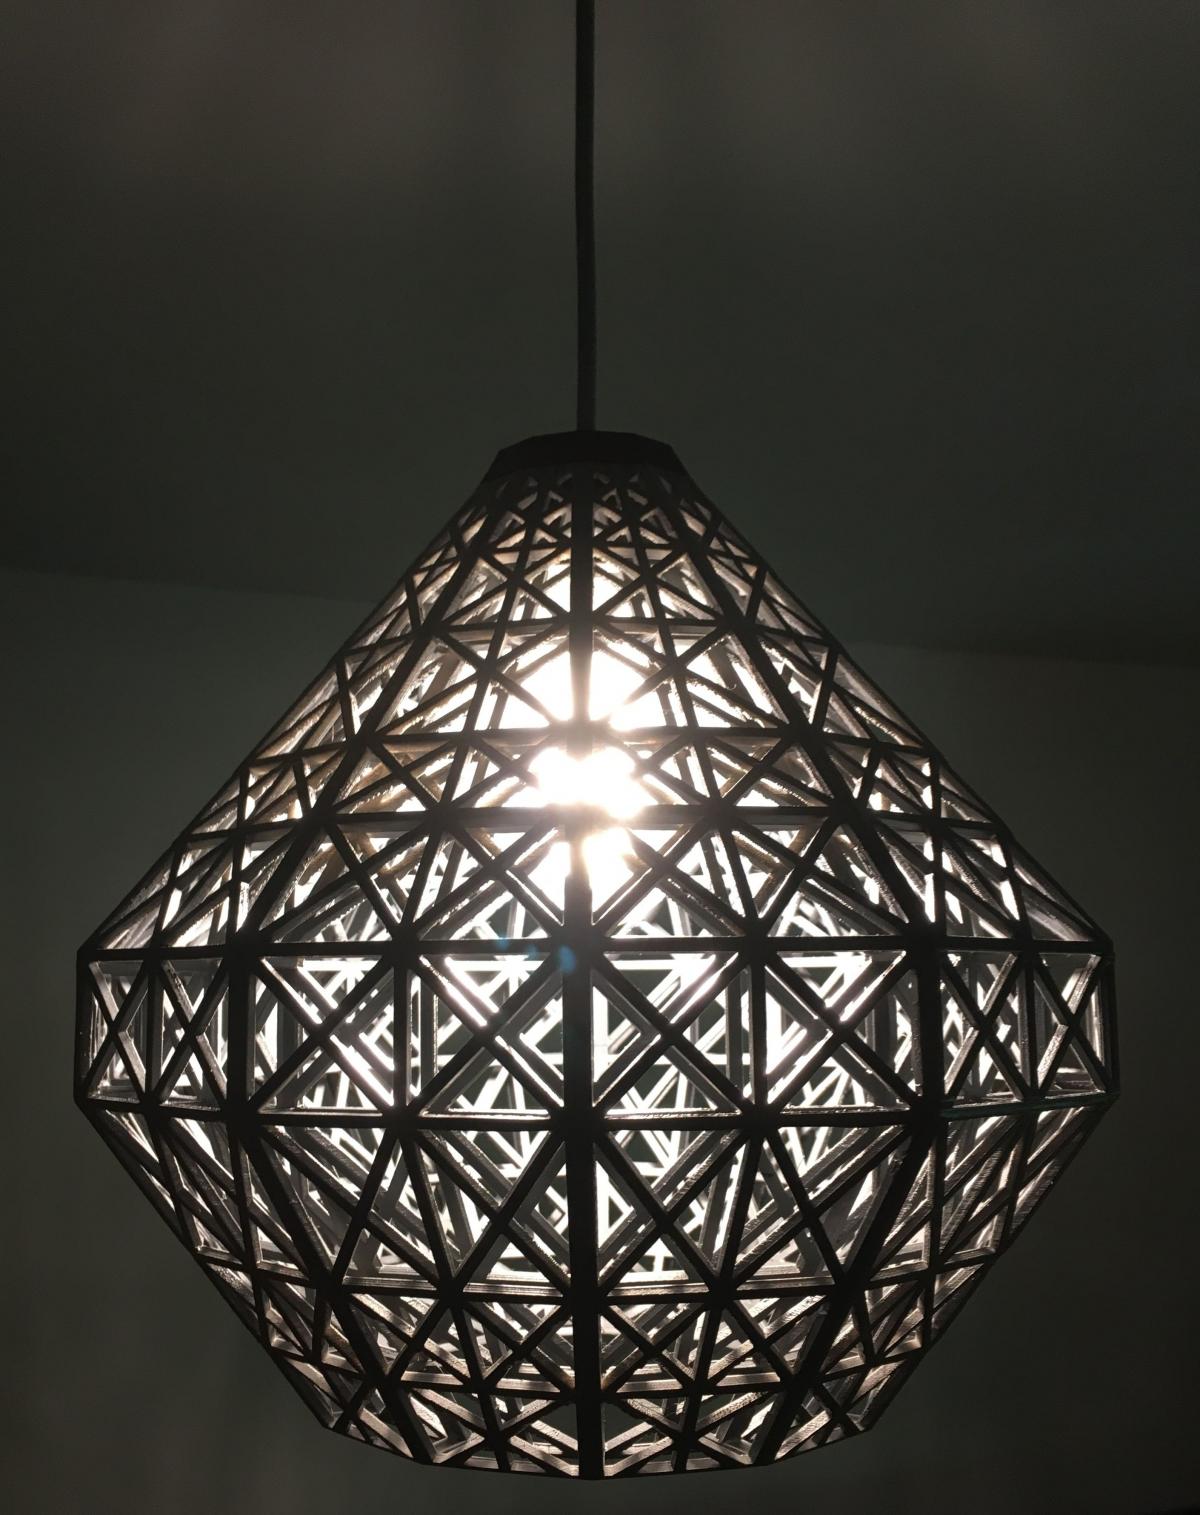
I also finished my Paris lamp. Looks very similar. I think, it´s a real challenge for the printer to print so long bridges without support, so I´m happy with the result. The hinging strings can easily be removed by hand. By the way, I used Hips Material. I used a black color and after printing my wife decided that only a white lamp is allowed. So I repainted it with a spray can and because of the unlucky open surface, i took more than 1 can to complete the painting.